How to soundproof a cargo van
After watching a lot of van conversion videos and doing a lot of research online, we decided to add sound deadening before our van insulation process. A cargo van is just a giant metal box and there is no layer of insulation at all. We drove our van in the rain the night before, and we could hear every rain drop hitting on our roof. We thought that adding sound deadening to our van is necessary. So here we go!
What We Used
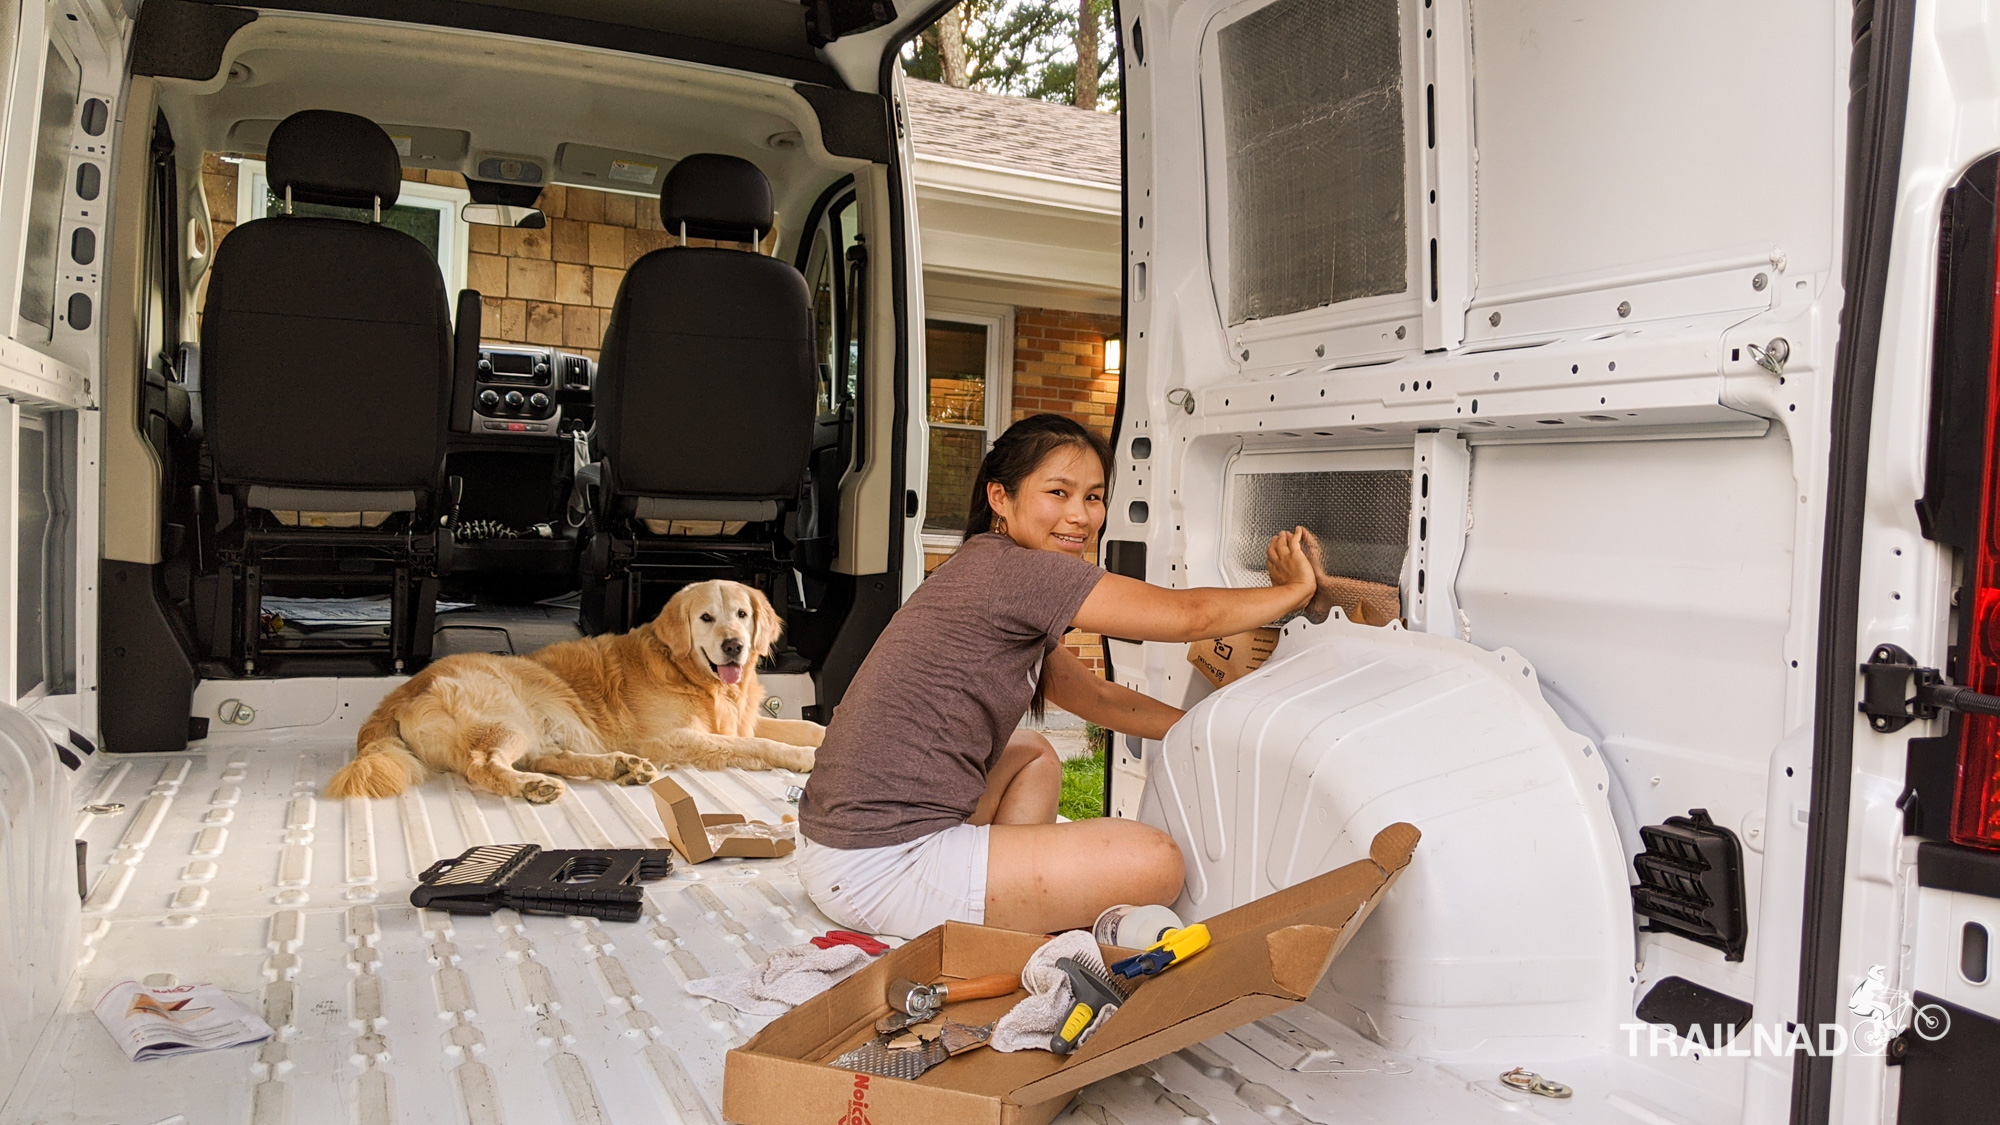
1. Sound deadening mat: 3 boxes of Noico 80 mil

I chose to go with Noico because it is one of the popular brands and it had such great reviews on Amazon.com. So I bought 3 boxes of it and it was perfect for the size of our van (2019 Promaster 136″ Wheelbase). I put it on the ceiling, both sides of the cargo, the wheel wells, the slide door, and the floor.
2. Sound deadening rollers

The one I purchased came with 3 different rollers with 3 different sizes and they were great. I used all of them. The smaller ones are great for smaller areas.
3. A pair of scissors

4. Diluted rubbing alcohol solution

5. A cloth

How We Did it
Step 1: Clean your van
Our van was already pretty clean. Therefore, it was pretty easy for us to clean the inside of it. You want to make sure that you clean the dust off the surface of the interior before applying the mat on it. We used diluted rubbing alcohol solution with a cloth to clean any grease on the surface of the van and let it dry.
Step 2: Measure and Cut the mat
Measure the area that you want to put the sound deadening mat on. Use a pair of scissors to cut the mat to your desired size. You do not need to cover the whole surface. Putting it at least 25% of the surface can effectively reduce the rattling noise in the van. However, you want to make sure that you cover the wheel wells as much as you can because a lot of noise comes from those spots.
Step 3: Peel and Place the mat to your van interior
Gently peel off the mat from the paper. Don’t peel it all at once. Place it on the area that you want to put it on, and slowly use your hand/thumb to gently help to put the mat in place while slowly peeling of the protective paper from the mat. You want to make sure that there is no air between your mat and the surface. You should wear gloves to protect your hands doing this because the edge of the foil can be pretty sharp. However, I didn’t wear gloves when I did this. But I was being very careful doing it.
Step 4: Use a roller to smooth out the surface of the mat on your van

With Noico mat, it has pattern texture on it. It helps you to notice the area that you have not pressed some pressure on. You want to make sure to use the roller to smooth the pattern texture on the mat.
Step 5: You are done!

I left some room on the ceiling for us to install roof fans later on.


The wheel wells were the most challenging area to put the mat on! I found that doing it in a little hot temperature was easier because the mat would be more soft and easier to mold it to the surface that is not flat.


I worked on it every day after work for 3 days and finished most of it except the floor. We decided not to install the mat on the floor since we might not be able to start installing the floor on the van that quickly. In this case, we won’t be destroying the mat by walking on it directly.
I found that the process was very easy. I didn’t rush the process and actually really enjoyed doing it. It was a therapeutic and good stress relief process for me.
You will learn to enjoy the process… and to surrender your need to control the result. You will discover the joy of practicing your creativity. The process, not the product, will become your focus.
Julia Cameron